

How to Export Lovable Project to Cursor, and Why It’s Worth Doing

April 29, 2026 - 7 min read

Author

You’ve built a working prototype with Lovable, but now the cost is becoming a concern. Or maybe you want more control over your project and a way out of vendor lock-in.
Lovable is a powerful platform, but it has limits that push some builders to move elsewhere.
This guide explains why builders are migrating their projects to Cursor and shows how to transfer a Lovable project to Cursor step by step.
Why migrate from Lovable to Cursor?
Lovable has earned a strong following among builders, but it still has downsides. These are the most common reasons developers move their projects to Cursor.
High token consumption
Lovable’s pricing model can become hard to sustain when a project moves from prototype to production.
At first glance, Cursor and Lovable have similar pricing. Cursor Pro costs $20 per month, while Lovable Pro costs €25 per month.
Lovable’s €25 Pro plan gives builders 100 credits per month. Without using Lovable in practice, that number doesn’t clearly show how much work those credits cover.
Credit usage depends on the prompt. For example, a Lovable Cloud database connection prompt costs 1 credit just to create the database, without adding tables or extra SQL. Heavier prompts cost more, sometimes up to 5 credits per prompt, depending on how many lines of code are generated or changed.
That means intensive users on Lovable’s Pro plan can burn through all 100 credits after 20 to 30 interactions. That may be enough to generate a rough prototype, but it leaves no room for bug fixes or product scaling. Users then need to buy extra credits or upgrade their plan.
Cursor’s $20 Pro plan gives builders more flexibility because it lets them switch between AI models. It supports a wide range of models from top providers:
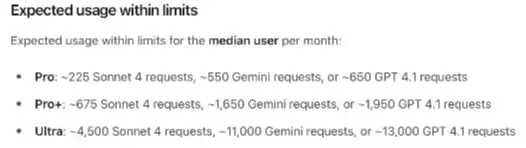
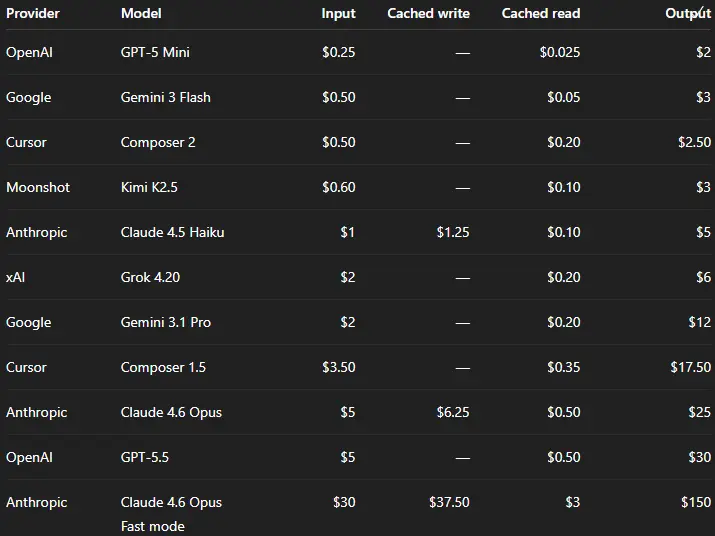 Cursor’s pricing and models documentation was recently updated and now it doesn’t disclose the expected usage. A few months ago, it showed that the Pro plan included around 225 Sonnet 4 requests, 550 Gemini requests, or 650 GPT-4.1 requests.
 By choosing the right model for each task and optimizing prompts, Cursor users can get up to 10 times more generations for the same amount they would spend on Lovable.
No token return on failed tasks
One of the biggest pricing traps in many AI coding platforms is the lack of a credit return mechanism for failed tasks.
Bugs are a normal part of software development, and so is fixing them. For non-technical builders, though, spotting a bug is much harder, especially when it’s buried inside a wall of AI-generated code.
As the codebase grows, bugs become more common, and token usage can rise quickly. A frontend issue is usually easier to spot and describe. An API connection problem is harder because the user has to explain the behavior clearly, and the AI has to find the issue in the right part of the codebase.
If Lovable fails to find the issue, or changes code that was already working, it still consumes credits. The user is left with the same problem, or sometimes a new one.
Cursor uses credits more conservatively and lets users switch between models. Builders can choose a cheaper model for small bug fixes or routine refactoring, then use a more expensive model for issues that lightweight models can’t solve.
Black box and vendor lock
Lovable runs in the browser, generates a project UI quickly, and can handle the backend inside its own platform.
At the prototype or early build stage, this is useful. Builders can move quickly without dealing with environment configs, databases, and backend wiring, which can take days for developers starting side projects and even longer for non-technical solopreneurs.
That simplicity becomes costly later. Builders are limited to the database offered by Lovable Cloud, the frameworks Lovable uses, and the integrations the platform supports. This gives users less control over the project and ties them to Lovable’s supported tools.
Cursor is more technical. It works with the same tools developers already use, since Cursor is built as a fork of Visual Studio Code.
You may need to connect third-party apps manually, but Cursor AI can guide you through the setup. You also aren’t limited to Lovable’s library of 40+ connectors.
Builders with technical knowledge can edit the code directly in Cursor because it gives them direct access to the codebase.
Cursor has a steeper learning curve, but it still gives builders the same level of AI assistance while letting them keep more control over the project.
How to migrate from Lovable to Cursor
Now that we’ve covered the reasons for migrating, let’s walk through how to move a project from Lovable to Cursor.
Connect Lovable to GitHub
First, we need to connect our Lovable account to GitHub. This lets you save the project in a GitHub repository, which you’ll later sync with Cursor.
-
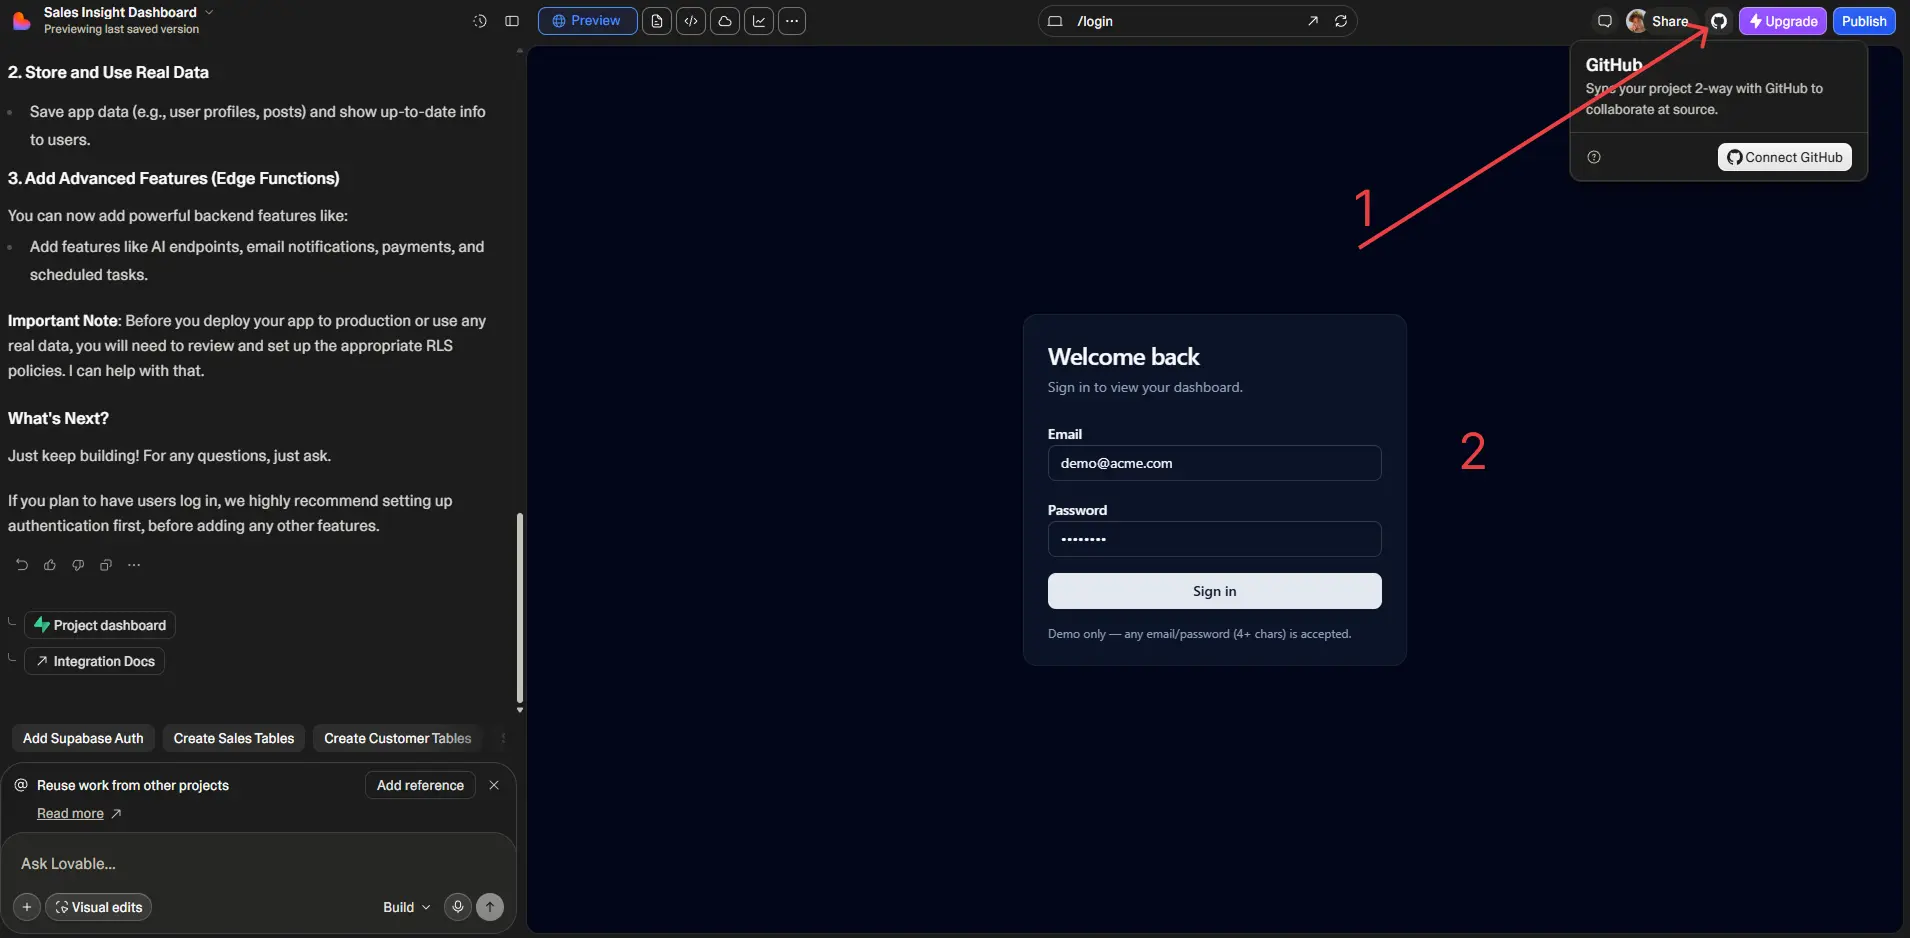
Open your project in Lovable. In the top-right corner, click the button with the GitHub logo, then click Connect GitHub.
-
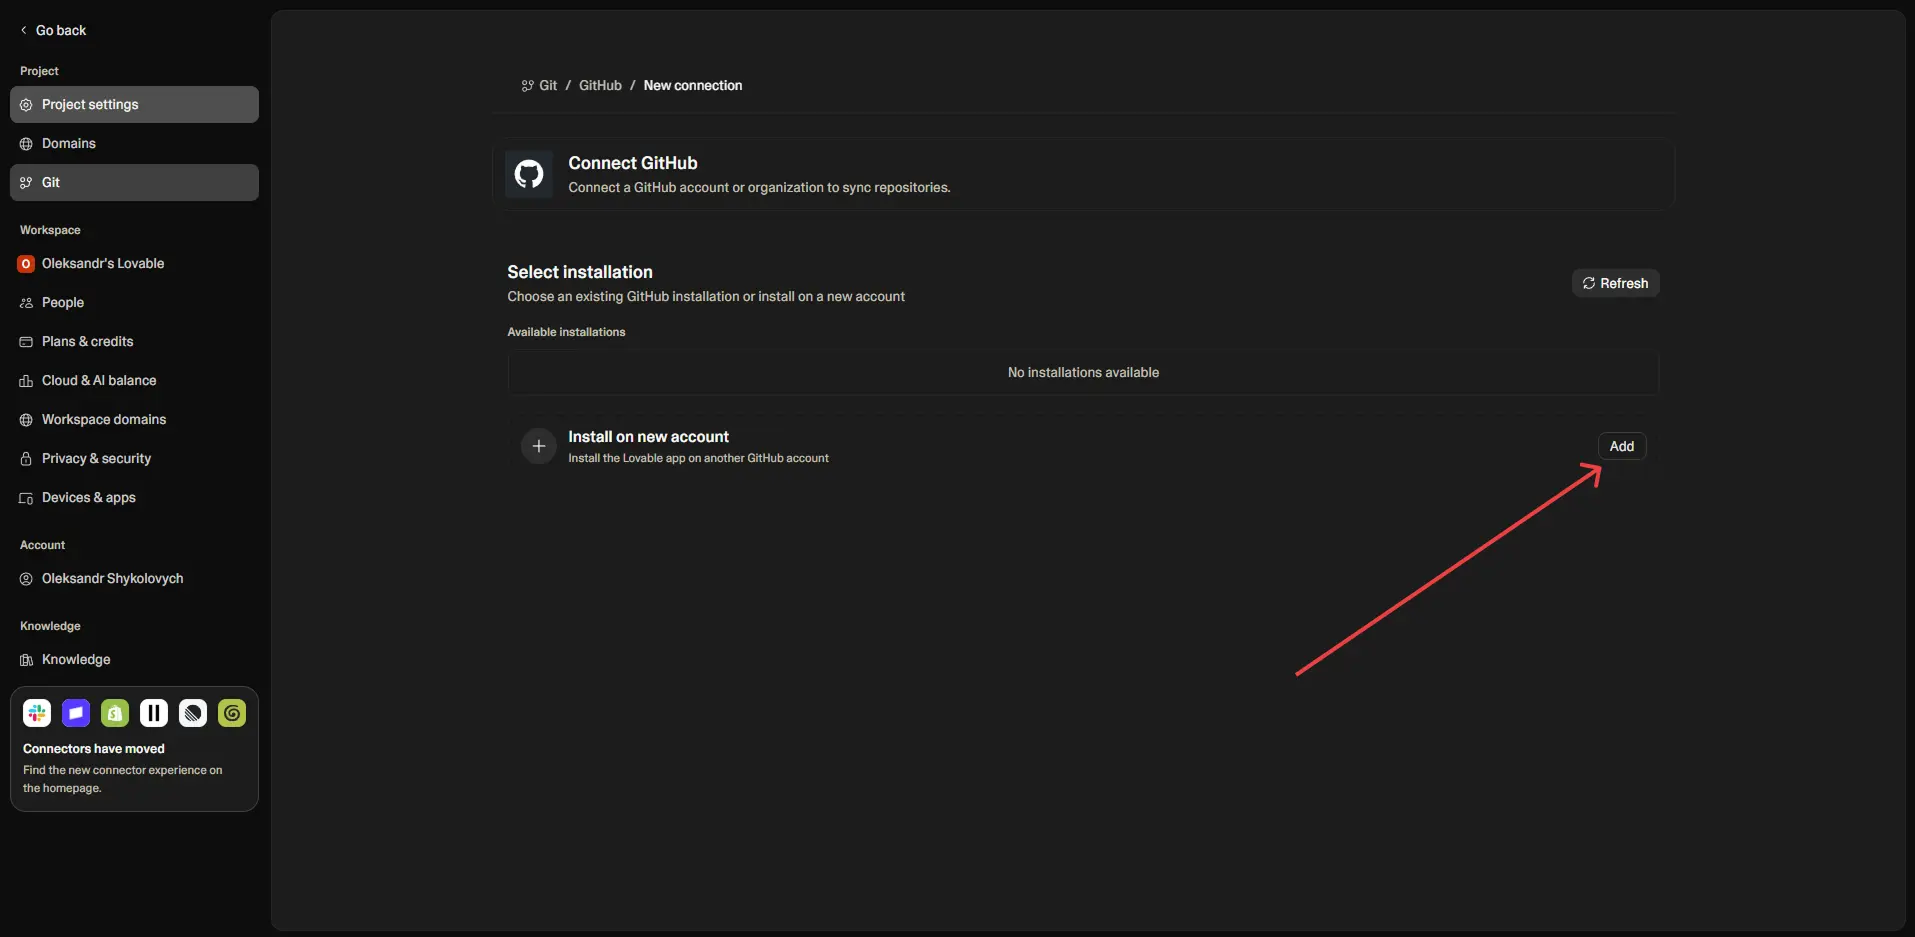
On the next screen, scroll down to the Install on a new account section and click Add.
-
A new modal will ask you to connect the GitHub project to your account. Follow the instructions in the window. You can also sign up for GitHub there if you don’t have an account yet.
-
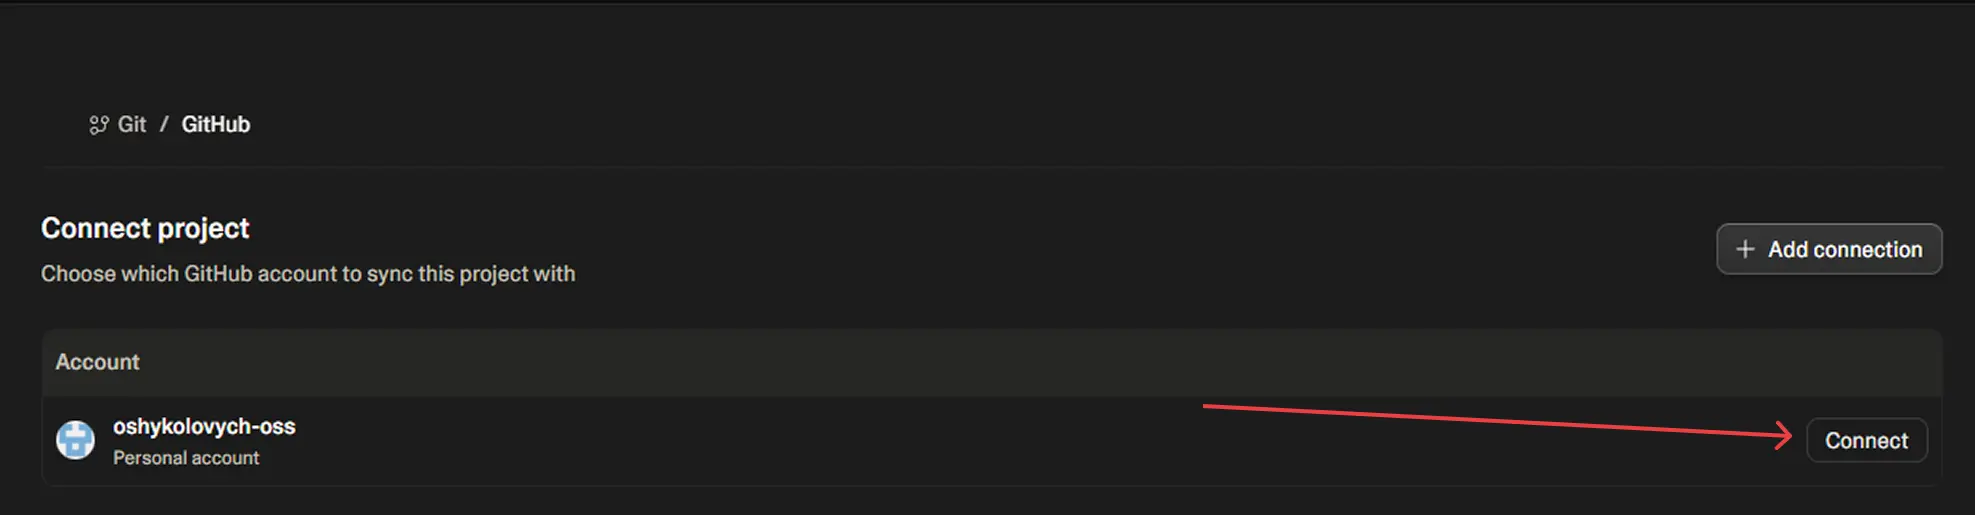
After that, your GitHub profile will appear in Lovable. Click Connect next to the GitHub account you want to link to your project.
-
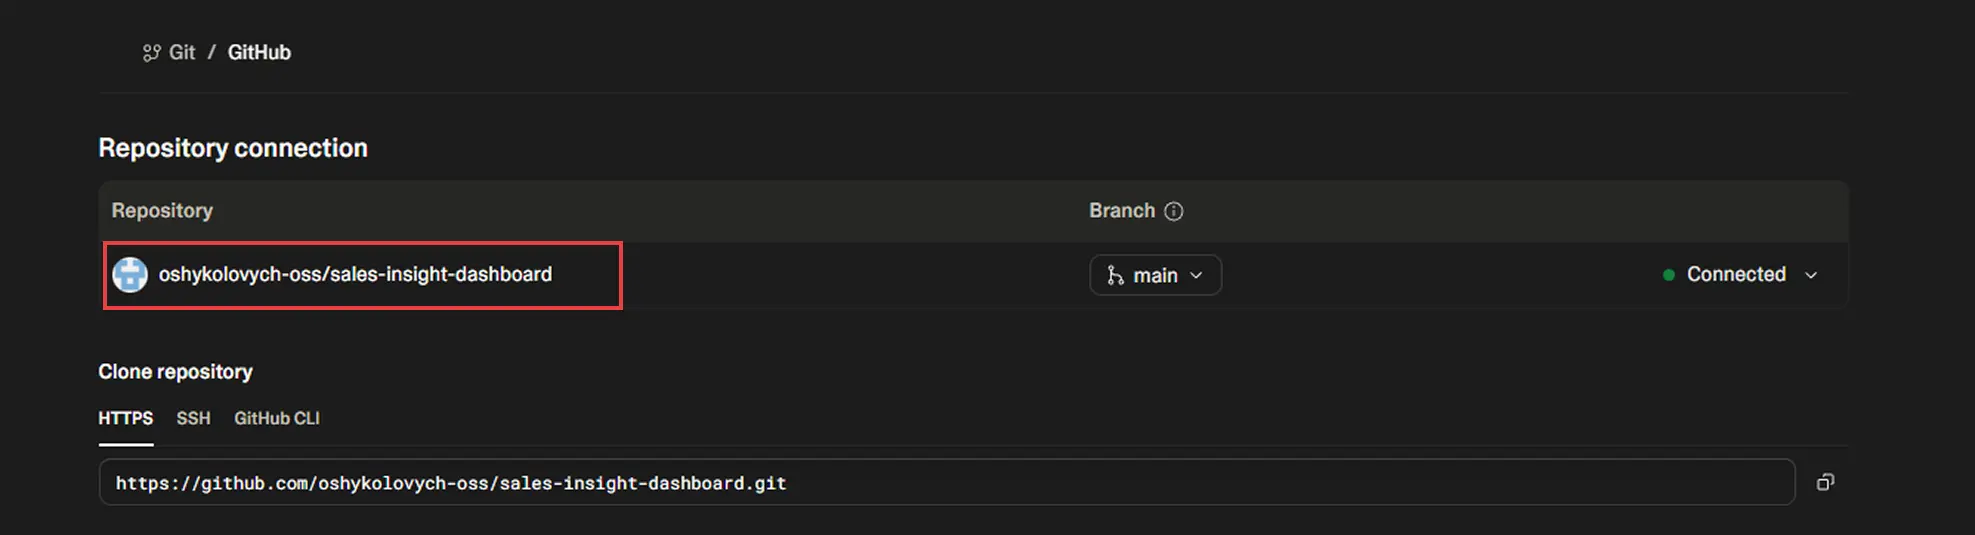
Syncing may take a few minutes. Once it finishes, Lovable will show the repository connection. You’ll also be able to find the project in your GitHub account under a repository with the same name as your Lovable project.
Connecting Cursor to GitHub
Once the GitHub repository is set up, it’s time to connect Cursor. Download Cursor from the official website if you haven’t already.
-
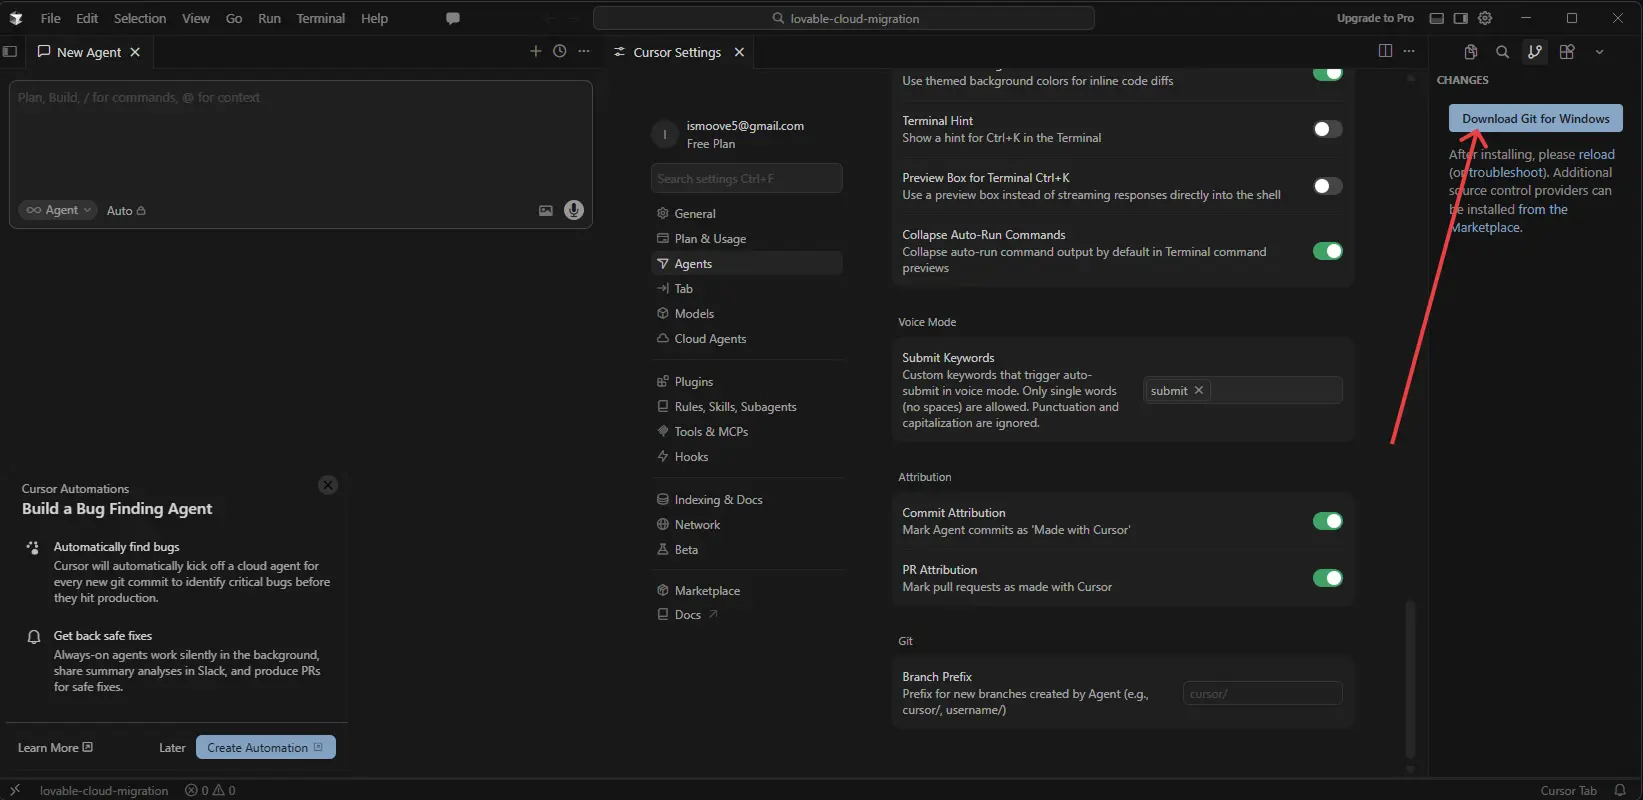
In Cursor, connect your GitHub account first. If you don’t have Git for Windows installed, download it from the link suggested by Cursor or from Git’s official website.
-
After installation, Cursor will prompt you to connect your GitHub account in the same tab.
-
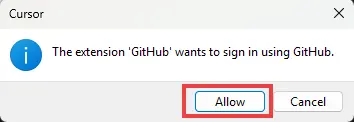
A modal window will appear. Click Allow.
-
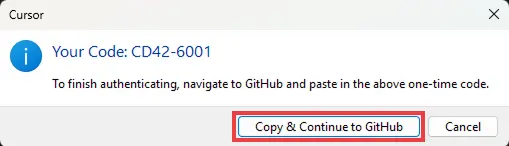
Another modal will show an authentication code. Click Copy & Continue to GitHub. This code will be used to authenticate Cursor with your GitHub account.
-
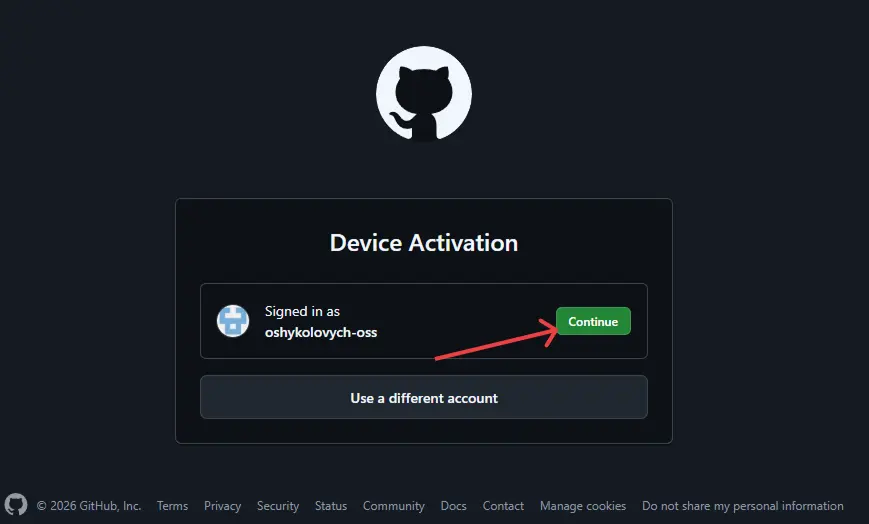
In the new window, choose the GitHub account where you migrated your Lovable project.
-
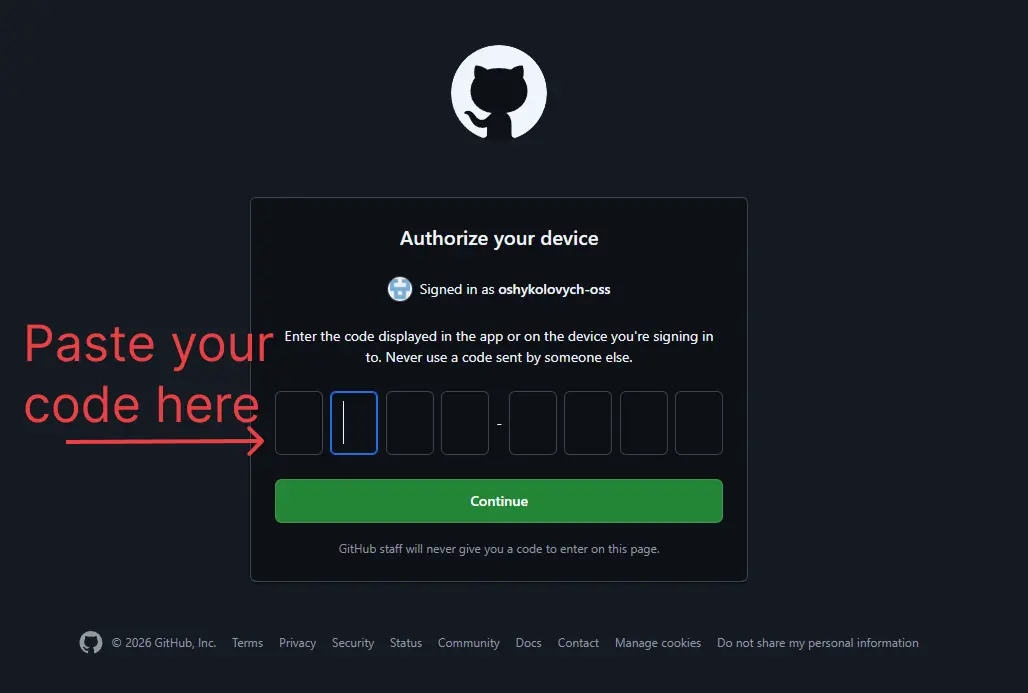
Paste the authentication code from the previous step.
-
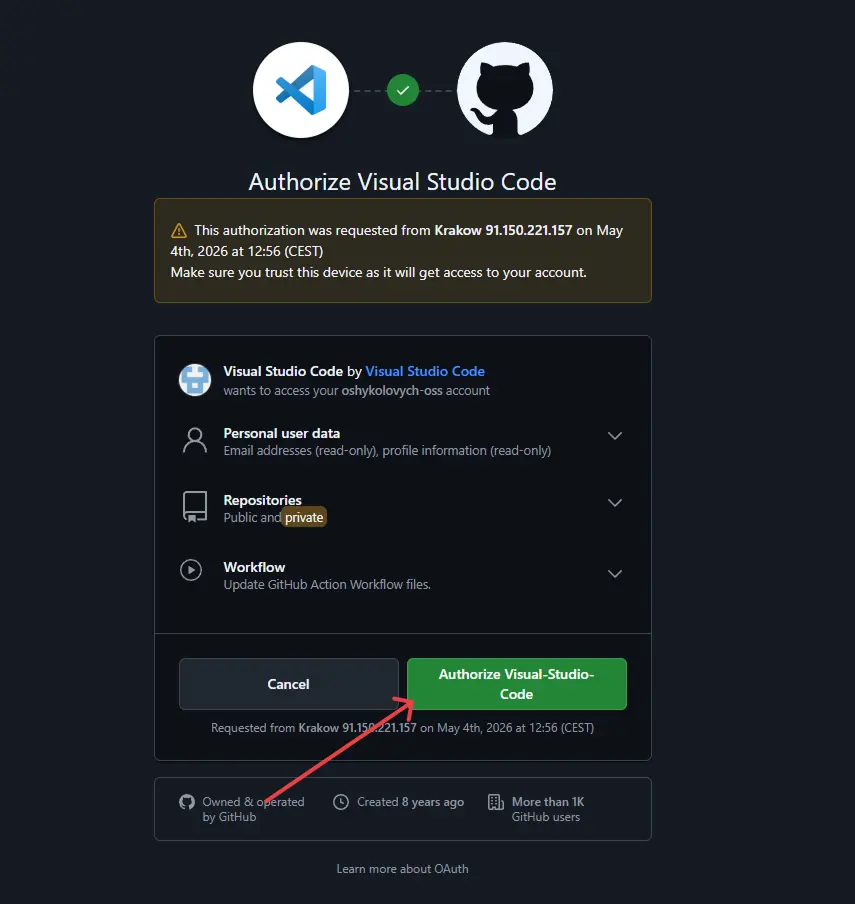
Click Authorize Visual-Studio-Code. This is still Cursor. Since Cursor is a fork of VS Code, GitHub recognizes it as Visual Studio Code.
-
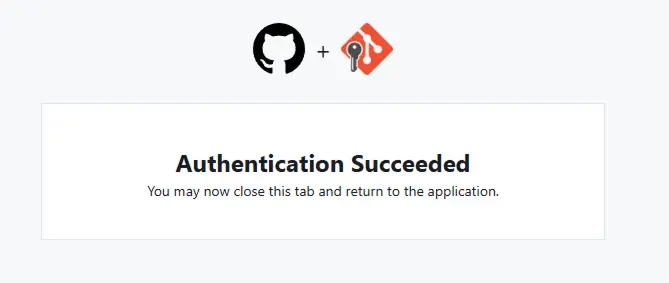
After that, you should see a success screen.
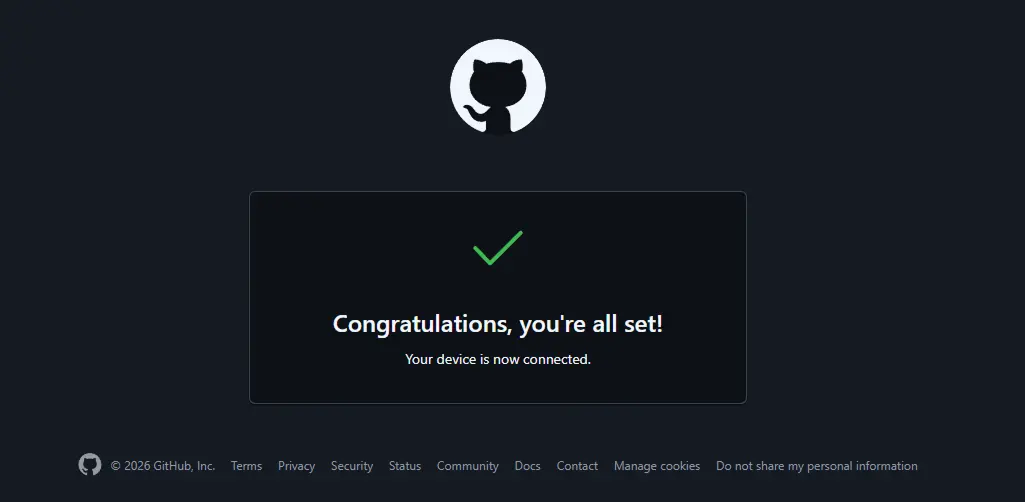
Your Cursor account is now connected to GitHub, and you’re ready for the final step.
Migrating your Lovable project to Cursor
Finally, let’s open our Lovable project in Cursor. To do that, we need to download it from the GitHub repository created earlier.
-
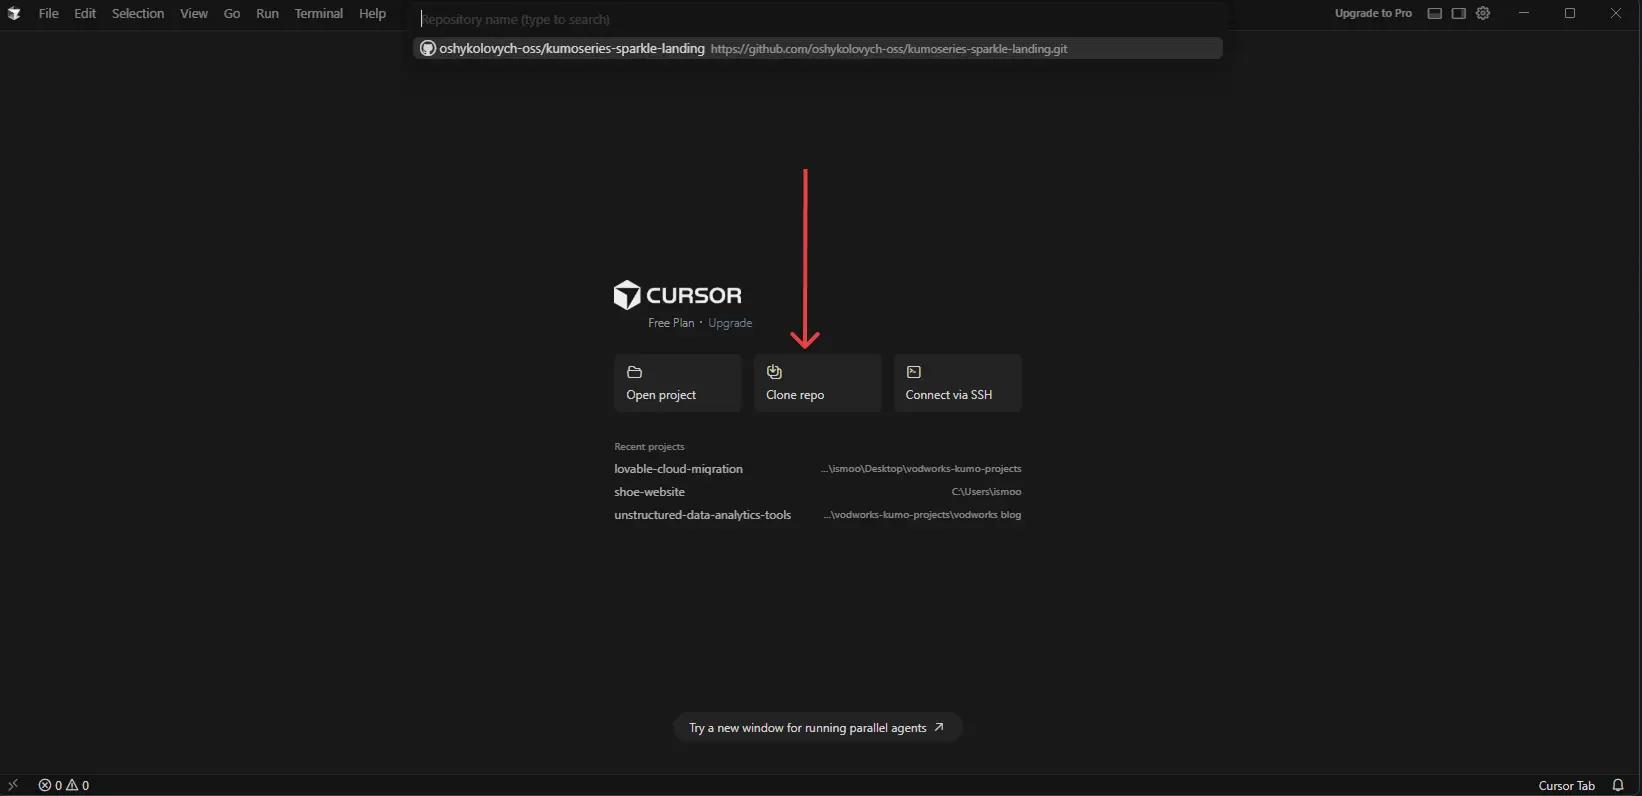
On Cursor’s start screen, choose Clone repo.
-
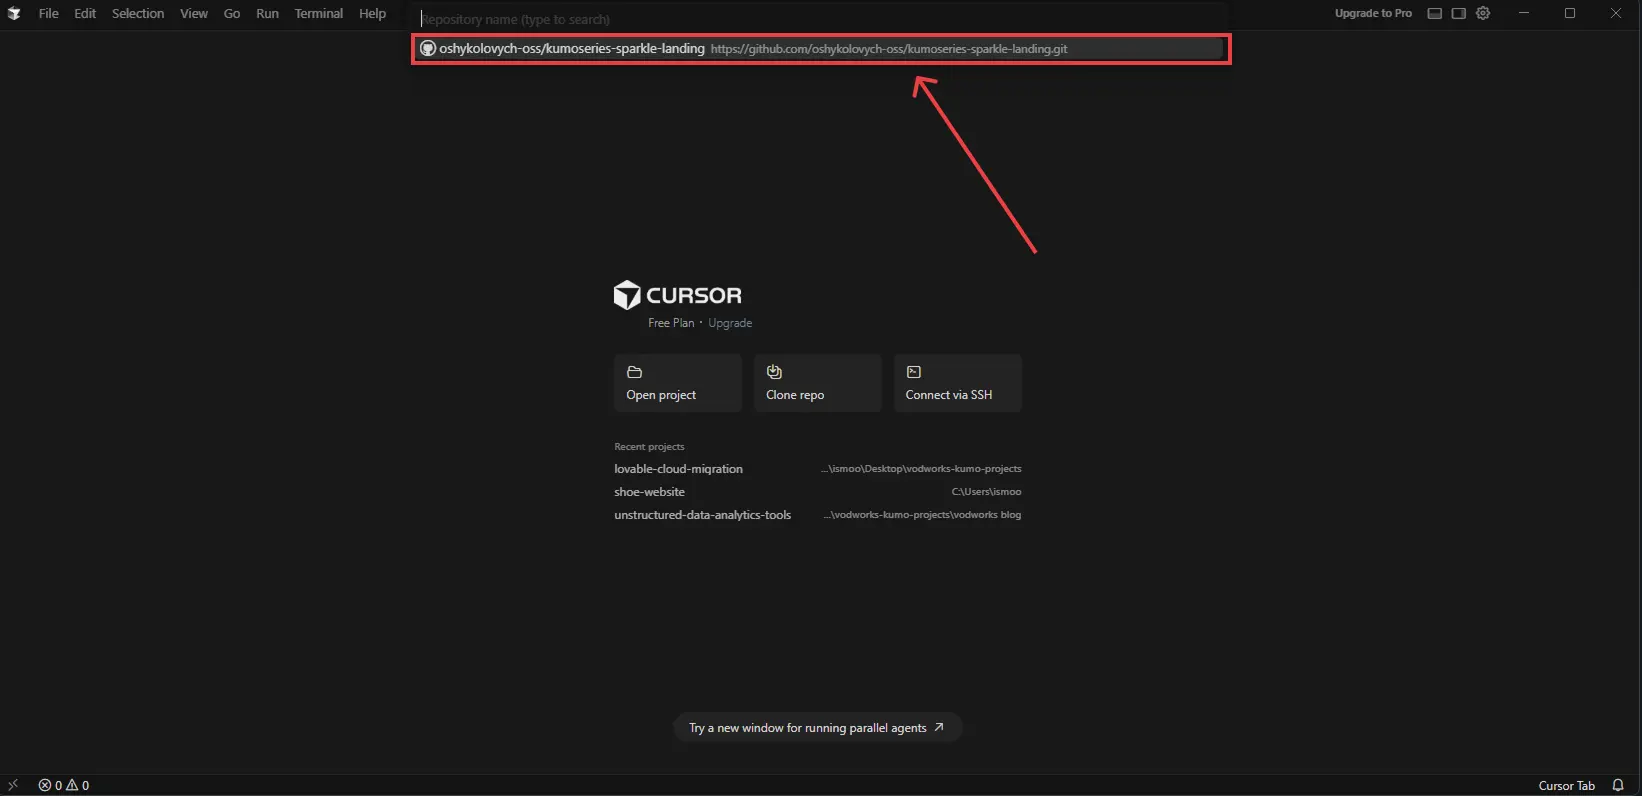
A small dropdown will appear under the search bar at the top. Choose the project you want to open from your GitHub account.
-
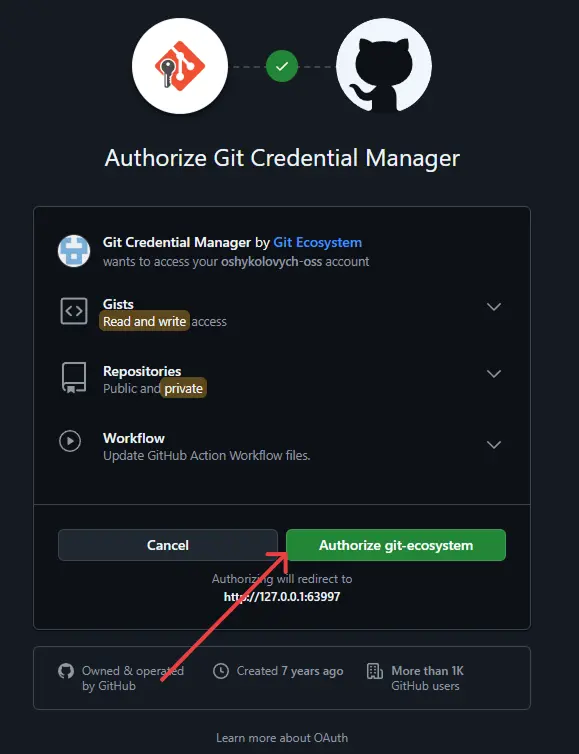
A Git Credential Manager browser tab will open. Click Authorize git-ecosystem.
-
A success window will appear. You can safely close it.
-
After that, another Cursor modal will ask you to open the project. Click Open or Open in New Window.
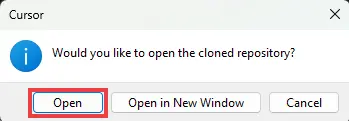
-
If everything worked, Cursor will open your GitHub repository.
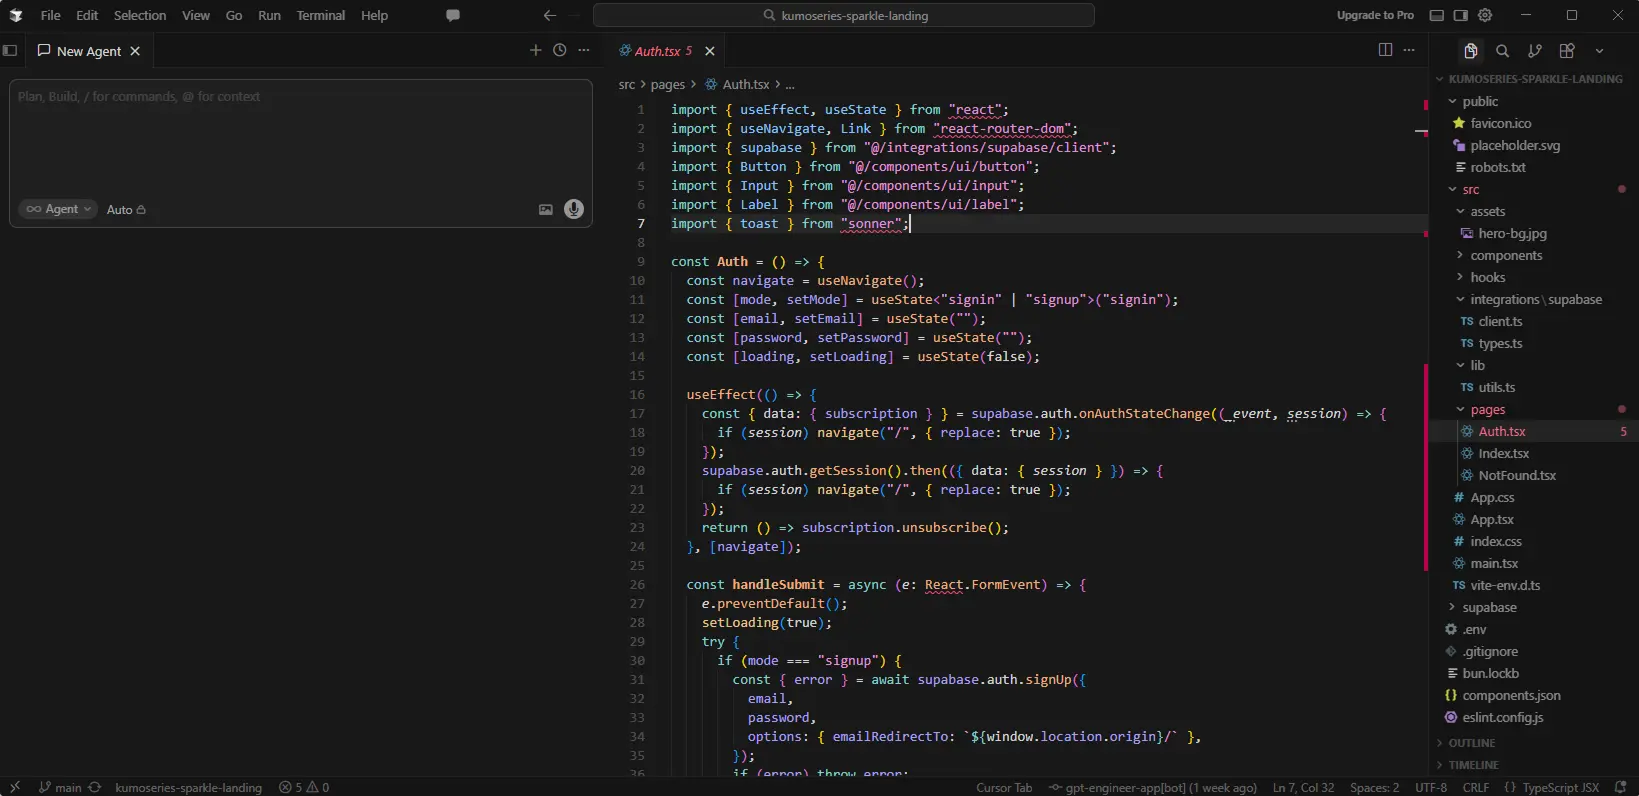
On the left, you can talk to the AI Agent. On the right, you can browse through all the folders and files in your project.
That’s it. You can now continue working on your project in Cursor.
What happens after the project is in Cursor
Moving from Lovable to Cursor gives you more control, but it also puts you closer to the developer side of the project. You now have access to the codebase, dependencies, environment variables, database logic, and deployment setup. That’s useful, but it can also be a lot to manage if you’re not used to working inside a code editor.
Cursor can make AI-assisted bug fixing and refactoring cheaper than Lovable, but it doesn’t solve those problems automatically. If the app already has broken auth, messy database logic, exposed API keys, or a bug that AI keeps misreading, moving the code to Cursor may only make the next round of prompts less expensive.
At some point, every AI-built project needs a proper engineering pass. A senior engineer can review the codebase, find the real source of the issue, clean up the parts that AI patched too many times, and prepare the app for real users.
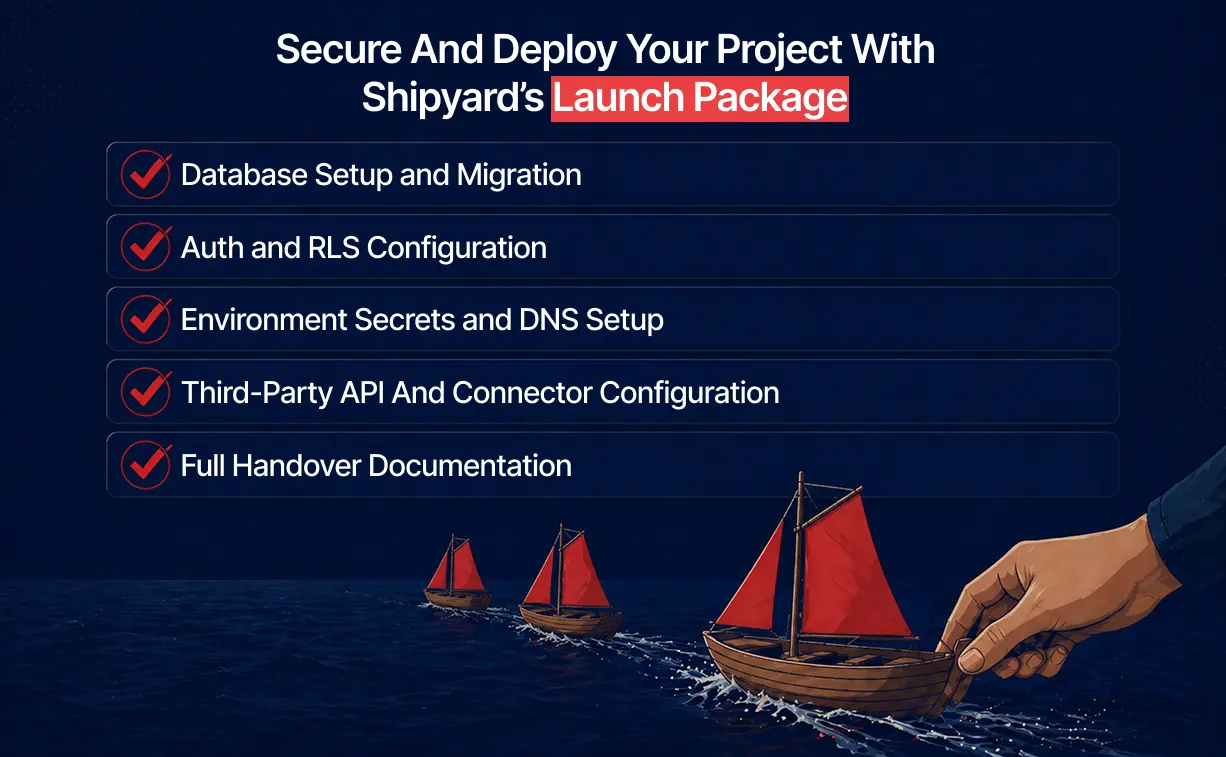
Shipyard helps with that step by bringing a senior engineer into the project after the prototype stage. For a migrated Lovable project, that usually means reviewing the codebase, fixing the fragile parts, and setting up the pieces needed for production.
That can include database setup, auth and RLS fixes, API key security, third-party integrations, deployment, and handover documentation. Shipyard works with projects built in Lovable, Cursor, Bolt, Replit, v0, Windsurf, and other AI tools. It’s backed by Vodworks, a software delivery company with 14+ years of experience building production software.
For technical support or a security review, you can book a free discovery session. You’ll share the details of your project, and one of our engineers will make an initial review of the codebase.

About the Author
Hussain Ali
With over 16 years of expertise, Hussain is a distinguished professional in full stack, mobile, game, and blockchain development. As a solution architect, he excels in pre-sales, displaying a strong inclination towards innovative strategies. Hussain has significantly impacted the gaming industry, contributing to both 2D and 3D games. Beyond coding, he actively shapes entire game narratives, including mechanics and story development. Dedicated to solving intricate challenges, he crafts meticulous technical proposals for Request for Proposals (RFPs), ensuring seamless integration of technology and business objectives.


Accelerate Your Projects With Our On-Demand Developers
Let's TalkTalent Shortage Holding You Back? Scale Fast With Us
Frequently Asked Questions
How do you handle different time zones?

With a team of 150+ expert developers situated across 5 Global Development Centers and 10+ countries, we seamlessly navigate diverse timezones. This gives us the flexibility to support clients efficiently, aligning with their unique schedules and preferred work styles. No matter the timezone, we ensure that our services meet the specific needs and expectations of the project, fostering a collaborative and responsive partnership.
What levels of support do you offer?
We provide comprehensive technical assistance for applications, providing Level 2 and Level 3 support. Within our services, we continuously oversee your applications 24/7, establishing alerts and triggers at vulnerable points to promptly resolve emerging issues. Our team of experts assumes responsibility for alarm management, overseas fundamental technical tasks such as server management, and takes an active role in application development to address security fixes within specified SLAs to ensure support for your operations. In addition, we provide flexible warranty periods on the completion of your project, ensuring ongoing support and satisfaction with our delivered solutions.
Who owns the IP of my application code/will I own the source code?
As our client, you retain full ownership of the source code, ensuring that you have the autonomy and control over your intellectual property throughout and beyond the development process.
How do you manage and accommodate change requests in software development?
We seamlessly handle and accommodate change requests in our software development process through our adoption of the Agile methodology. We use flexible approaches that best align with each unique project and the client's working style. With a commitment to adaptability, our dedicated team is structured to be highly flexible, ensuring that change requests are efficiently managed, integrated, and implemented without compromising the quality of deliverables.
What is the estimated timeline for creating a Minimum Viable Product (MVP)?
The timeline for creating a Minimum Viable Product (MVP) can vary significantly depending on the complexity of the product and the specific requirements of the project. In total, the timeline for creating an MVP can range from around 3 to 9 months, including such stages as Planning, Market Research, Design, Development, Testing, Feedback and Launch.
Do you provide Proof of Concepts (PoCs) during software development?
Yes, we offer Proof of Concepts (PoCs) as part of our software development services. With a proven track record of assisting over 70 companies, our team has successfully built PoCs that have secured initial funding of $10Mn+. Our team helps business owners and units validate their idea, rapidly building a solution you can show in hand. From visual to functional prototypes, we help explore new opportunities with confidence.
Are we able to vet the developers before we take them on-board?
When augmenting your team with our developers, you have the ability to meticulously vet candidates before onboarding. We ask clients to provide us with a required developer’s profile with needed skills and tech knowledge to guarantee our staff possess the expertise needed to contribute effectively to your software development projects. You have the flexibility to conduct interviews, and assess both developers’ soft skills and hard skills, ensuring a seamless alignment with your project requirements.
Is on-demand developer availability among your offerings in software development?
We provide you with on-demand engineers whether you need additional resources for ongoing projects or specific expertise, without the overhead or complication of traditional hiring processes within our staff augmentation service.
Do you collaborate with startups for software development projects?
Yes, our expert team collaborates closely with startups, helping them navigate the technical landscape, build scalable and market-ready software, and bring their vision to life.
Our startup software development services & solutions:
- MVP & Rapid POC's
- Investment & Incubation
- Mobile & Web App Development
- Team Augmentation
- Project Rescue
Subscribe to our blog
Related Posts
Get in Touch with us
Thank You!
Thank you for contacting us, we will get back to you as soon as possible.
Our Next Steps
- Our team reaches out to you within one business day
- We begin with an initial conversation to understand your needs
- Our analysts and developers evaluate the scope and propose a path forward
- We initiate the project, working towards successful software delivery